Arch Linux
A simple, lightweight distribution
ディストリビューション
スクリーンショット
Arch Linuxのインストール インストーラISOファイルのダウンロード Arch Linux のGUI インストーラであるCalam Arch Installerを利用します。https://sourceforge.net/projects/blue-arch-installer/files/arch-installer/
USBメモリの作成(物理PCにインストールする場合)
USB メモリにVentoyをセットアップhttps://ventoy.net/en/index.html
USBメモリにCalam Arch InstallerのISOファイルをコピー
USB メモリからブートして、Calam Arch Installerを選択
インストール
無効なリポジトリをコメントアウト/etc/pacman.confを編集して[community]の項目をコメントアウト
/etc/pacman.conf #[community] #Include = /etc/pacman.d/mirrorlist
https://archlinux.org/news/cleaning-up-old-repositories/
Calam Arch Installer起動後にミラーを選択して保存
Japan
Include https mirrors
タスクバーからTerminal Emulatorを選択して日本語フォントをインストール sudo pacman -S otf-ipafont
/usr/share/fonts/OTF/*.ttfにインストールされる
タスクバーからInstall Arch Linuxを選択してインストールを実行
マルチブートする場合はEFIパーティションを/boot/efiにマウント
デスクトップ環境にGNOMEを選択
パッケージは特に変更せずに継続
Base-devel + Common Packages
GNOME-Desktop
ユーザ情報では一旦「パスワードを尋ねずに自動的にログインする。」を選択
インストールが完了したら、インストール先パーティションのユーザ~/.fonts/に日本語フォントをコピーしておくと再起動後に日本語表示が可能
メディアを取り外して再起動
pulseaudioの削除
sudo pacman -Rdd pulseaudiosudo pacman -S pipewire-{jack,alsa,pulse}systemctl --user enable --now pipewire pipewire-pulse wireplumber
環境設定 ミラーリストを週次で最適化
reflectorをインストール
設定/etc/xdg/reflector/reflector.conf 10 11 12 13 14 15 16 17 18 19 20 21 22 23 24 25 26 27 28 29 --save /etc/pacman.d/mirrorlist --protocol https --country Japan --latest 5 --sort rate
週次実行設定sudo systemctl enable --now reflector.timer
次回実行時刻はsystemctl list-timersで確認できる。
即時実行したい場合のコマンドsudo systemctl start reflector.service
VirtualboxのゲストOSの場合 VirtualBoxの「デバイス」-「Guest Addition CDの挿入」メニューからメディアをマウントして導入する。virtualbox-guest-utilsは一部の機能が即時有効にならないので使わない。
cd /run/media/arch/VBox_GAs_*sudo ./VBoxLinuxAdditions.run
ウィンドウに最小化/最大化ボタンを追加 gsettings set org.gnome.desktop.wm.preferences button-layout ":minimize,maximize,close"
ホームフォルダの設定 LANG=C xdg-user-dirs-gtk-update
各種フォルダを英語名に変更する
テキストテンプレートファイルの作成 Nautilus上の右クリックで空のテキストファイルを作成できるようになる
基本パッケージの導入 sudo pacman -Syusudo pacman -S fcitx5 fcitx5-im fcitx5-mozc git gnome-browser-connector vi
日本語キーボードの場合の設定
fcitx5設定を起動キーボード - 英語(US)を削除Mozcの前にキーボード - 日本語(JP)を追加適用またはOKボタンを押下!!重要
paru (AUR) の導入 git clone https://aur.archlinux.org/paru-bin.git cd paru-binmakepkg -si
~/.config/paru/paru.conf [options] SudoLoop SkipReview
~/.makepkg.conf マルチブート時の時刻ズレ調整(物理PCにインストールする場合) sudo timedatectl set-local-rtc true
fish & starship https://ktkr3d.github.io/2024/10/17/fish_starship/
エイリアスの設定 ~/.config/fish/config.fish alias l='ls' alias upd='sudo pacman -Syyu; pacman -Qdtq | sudo pacman -Rs -; paru; fisher update'
man (日本語) Yaruアイコン GDMの解像度/向きをユーザセッションの解像度と同じにする sudo cp ~/.config/monitors.xml /var/lib/gdm/.config/monitors.xmlsudo chown gdm:gdm /var/lib/gdm/.config/monitors.xml
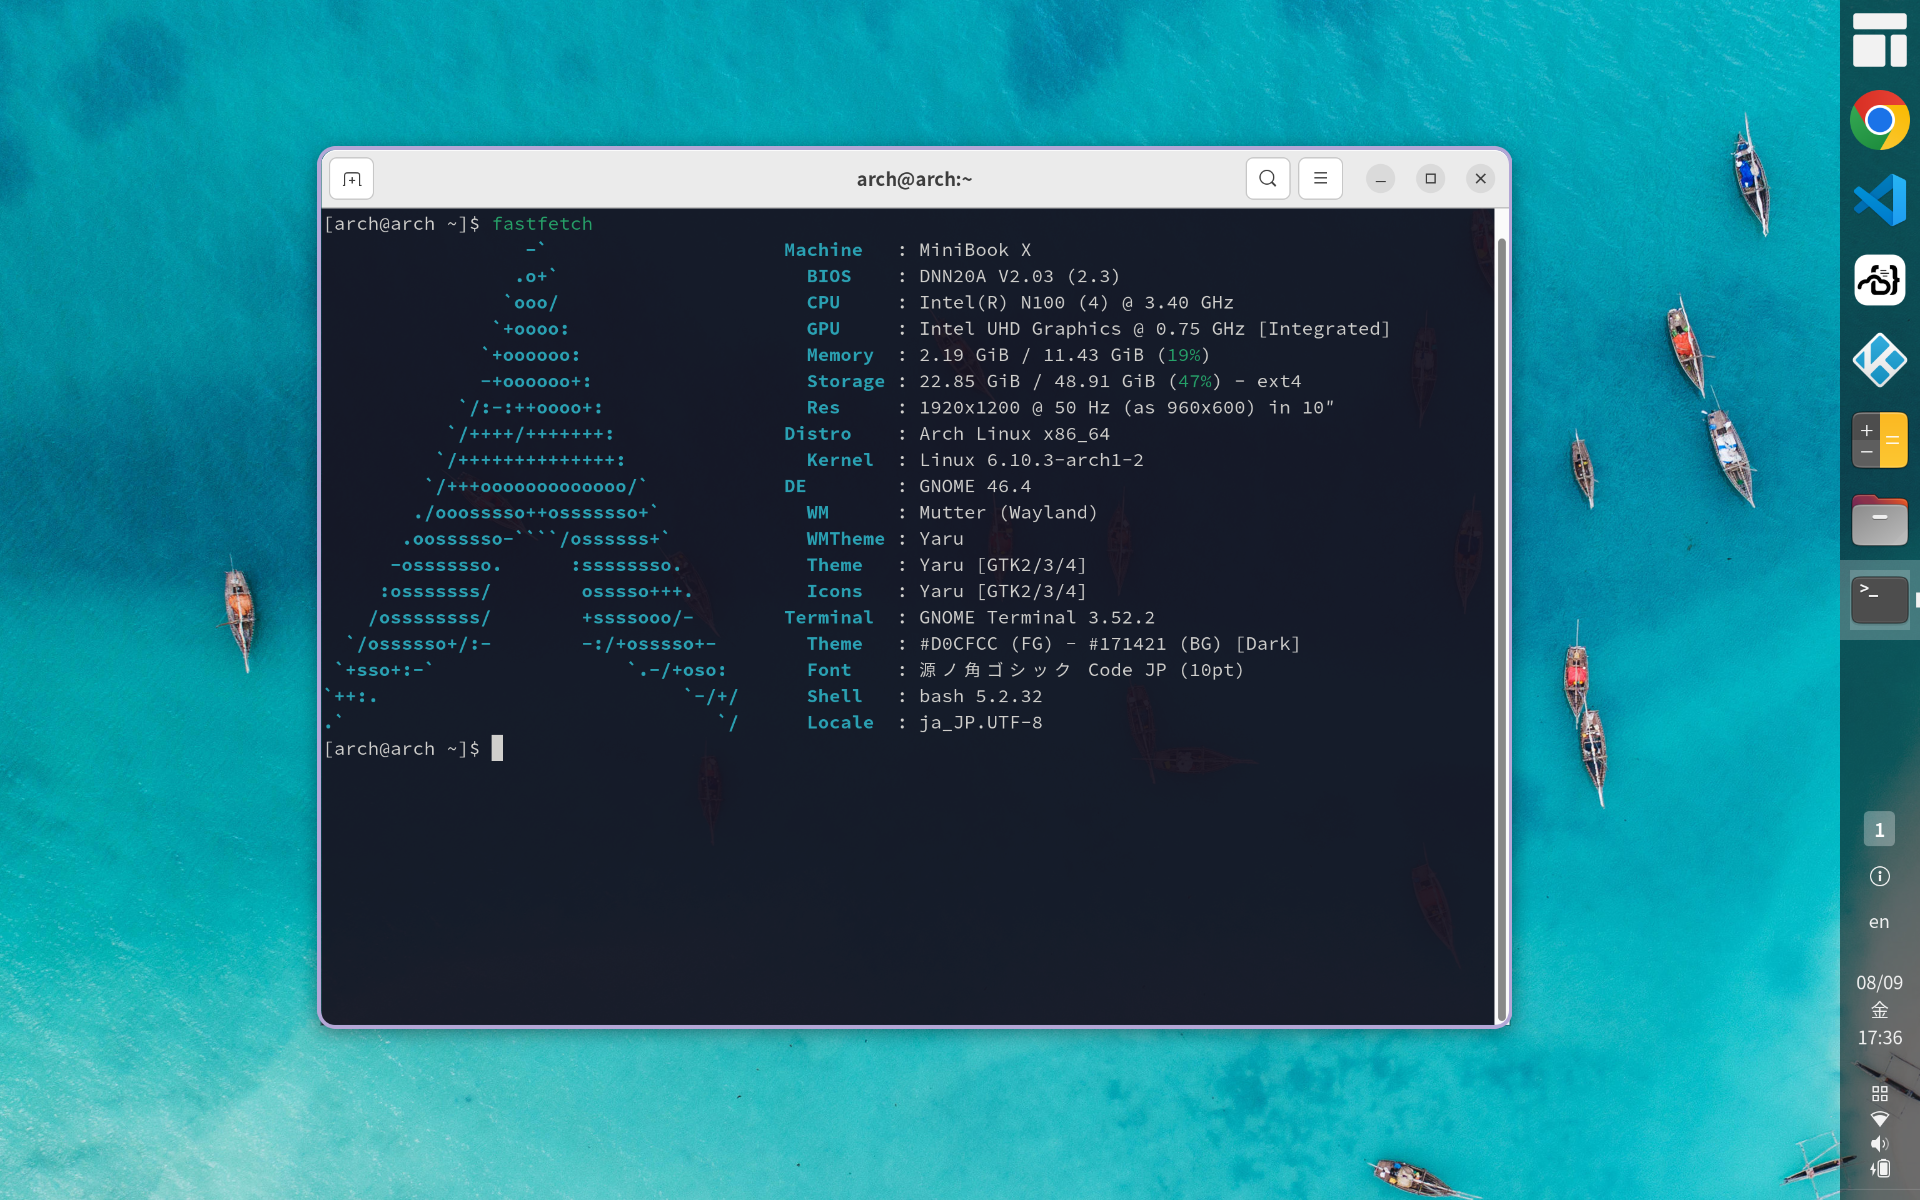
Fastfetch https://ktkr3d.github.io/2024/08/01/Fastfetch/?highlight=fast
vi ~/.exrc set showmodeset numberset rulerset titleset showcmd
nodejs https://github.com/tj/n
curl -L https://bit.ly/n-install | bash
ディスクの自動マウント
ディスクアプリを開く対象のパーティションを選択
歯車アイコンをクリック
マウントオプションを編集
ユーザセッションのデフォルトのチェックを外してOK
GDM 自動サスペンドの無効化 sudo -u gdm dbus-launch gsettings set org.gnome.settings-daemon.plugins.power sleep-inactive-ac-type 'nothing'
アプリケーション Ghosttyのインストール Google Chromeのインストール Visual Studio Code 設定 paru -S visual-studio-code-bin
https://ktkr3d.github.io/Visual-Studio-Code/
code-server 設定
Google Chrome を起動
CA証明書をインポート
対象サーバにHTTPSで接続
アドレスの右にあるインストールボタンでPWA化
Kodi 設定
インストール
キーマップ設定 ~/.kodi/userdata/keymaps/keyboard.xml <keymap > <global > <keyboard > <f12 > ContextMenu</f12 > <f12 mod ="shift" > ActivateWindow(shutdownmenu)</f12 > <end > ActivateWindow(shutdownmenu)</end > </keyboard > </global > <FullscreenVideo > <keyboard > <f12 > Playlist</f12 > </keyboard > </FullscreenVideo > </keymap >
F12 でコンテキストメニューを表示。C でも同様。Shift +F12 で終了メニュー表示。S でも同様。
Amazon MusicのPWA化
Google Chrome でAmazon Music( https://music.amazon.co.jp/ )を開く
三点リーダから[保存と共有]-[ページをアプリとしてインストール…]
Wayland関連の拡張設定 分数スケーリングの有効化 gsettings set org.gnome.mutter experimental-features "['scale-monitor-framebuffer']"
Wayland モードのChrome/Electronで日本語入力する設定 paru -S mutter-text-input-v1
衝突するパッケージがないか確認しています... :: mutter-text-input-v1-46 .3.1-1 and mutter-46 .3.1-1 are in conflict. Remove mutter? [y/N] y
なお、Program /usr/bin/glib-mkenums found: NOが出力される場合は以下を実行する。
sudo pacman -S glib2-devel
https://gitlab.archlinux.org/archlinux/packaging/packages/glib2/-/issues/7
Google ChromeのWaylandモード起動設定 ~/.config/chrome-flags.conf --ozone-platform-hint =auto--wayland-text-input-version =3
Visual Studio CodeのWaylandモード起動設定 ~/.config/code-flags.conf --enable-features =WaylandWindowDecorations--ozone-platform-hint =auto--enable-wayland-ime
Waylandモードの場合、app_idやWMClassが適切に設定されないためタスクバーにピン留めした起動アイコンとは別のアプリケーションと認識されてしまう。https://github.com/microsoft/vscode/issues/154693
Google Chrome設定
read.crxarticle {border-top : dotted 1px #000000 !important ;background-color : #FFFFEE !important ;}
Stylus@-moz-document domain("qiita.com" ) { .style-1y0vgst { display : none; } .style-5h0vi8 { display : none; } }
その他 nVIdiaのグラフィクスカードの場合
Lutiris
RDP Server sudo pacman -S xorg-xinitparu -S xrdp xorgxrdp-glamor pulseaudio-module-xrdp sudo systemctl enable xrdpsudo systemctl restart xrdp
~/.xinitrc 同時接続不可。すでにログインしているとセッションがすぐに切れる。要調査。
SMB sudo pacman -S sambasudo wget "https://git.samba.org/samba.git/?p=samba.git;a=blob_plain;f=examples/smb.conf.default;hb=HEAD" -O /etc/samba/smb.confsudo pdbedit -a -u arch
/etc/samba/smb.conf [global] log file = /usr/log/samba/%m.%m [homes] valid users = %S [share] path = /home/arch/Publicread only = no browsable = yes writable = yes guest ok = yes
sudo systemctl enable smb nmbsudo systemctl start smb nmb
sshd sudo pacman -S opensshsudo systemctl enable sshdsudo systemctl start sshd
NFS Service(参照用) sudo pacman -S nfs-utilssudo systemctl enable --now nfs-server.service
/etc/exports #echo "/mnt/d/home 192.168.11.0/24(rw,sync,no_subtree_check)" echo "/mnt/d/home 192.168.11.0/24(rw,sync=disabled,atime=off,no_subtree_check)"
sudo systemctl reload nfs-server.service
