OpenVPN Access Server
OpenVPN Access ServerをRaspberry Pi 4Bに構築してみました。
今回はPortainerのGUI画面を使ってOpenVPN Access ServerのDockerコンテナを生成しました。
2コネクションまでは無償利用可能なようです。
https://openvpn.net/access-server/
https://hub.docker.com/r/openvpn/openvpn-as
2025-11-15
https://docs.portainer.io/faqs/known-issues/known-compatibility-issues-with-docker-engine-29.0.0
PortainerはDocker 29と互換性がないという情報があったので試してみました。確かにDocker 29にバージョンアップしたところ動作しなくなりましたが以下のワークアラウンドで動作するようになりました。
https://github.com/portainer/portainer/issues/12925#issuecomment-3516549977
sudo systemctl edit docker.service |
[Service] |
sudo systemctl restart docker.service |
環境
- Raspbeyy Pi 4B
- Ubuntu 24.04 LTS (Arm64)
- Docker 28.5.2
- Portainer-CE 2.33.3
- OpenVPN Access Server 3.0.1
- Docker 28.5.2
- Ubuntu 24.04 LTS (Arm64)

構築
Docker
- 構築済のものを使用
Portainer
- 構築済のものを使用
OpenVPN関連パラメタの整理
指定するパラメタ
項目 値(例) 外部公開IPアドレス xxx.xxx.xxx.xxx外部公開ポート番号(TCP) 60000外部からアクセスしたいLANサブネット 192.168.11.0/24
PortainerでDockerコンテナを作成
Portainerにログイン
https://192.168.11.24:9443VolumeメニューでOpenVPN Access Server用のボリュームを作成
項目 値 Name openvpn-as_dataContainersメニューでAdd Container
以下のパラメタを指定してDeploy the container
分類 項目 値 Name openvpn-asImage Configuration Image openvpn/openvpn-as:latest Network ports configuration Port mapping 943, 943, tcp 60000,60000, tcpAdvanced container settings Volumes /openvpn, openvpn-as_dataRestart Policy Unless stopped Capabilities NET_ADMIN Cotainers >
openvpn-asを選択Container details > Container status > Logs を選択
Container logsで
openvpnアカウントのパスワードを確認検索条件
検索条件 指定値 Search Auto-generated pass Lines 1000 検索結果(例)
Auto-generated pass = "i2vTb42zklZu". Setting in db...
OpenVPN Access Serverの設定
OpenVPN Access Serverにユーザ名
openvpnでログイン
https://192.168.11.24:943/adminログから検索したパスワード
i2vTb42zklZuを指定します。アカウント
openvpnのパスワードを更新
Users >openvpn> User Settings > Authentication > New passwordVPNサーバのパラメタ設定
VPN Server > Network Settings で以下を設定項目 値 Server Address / Hostname (or IP address) xxx.xxx.xxx.xxxOpenVPN daemons / Protocol TCP TCP Port 60000ユーザを作成
UsersメニューでAdd New User
User01を追加ユーザのパスワードを設定
Users >User01> User Settings > Authentication > New passwordユーザのプロファイルを作成
Certificate Management > VPN Client Certificates > New Connection Profile > Username >User01
Downloadファイル名変更
profile-userlocked.ovpn→profile-User01.ovpnLANへの接続を許可
Access Controls > Global Access Rules > NAT > Subnet で+ Add new subnet
192.168.11.0/24を追加Restartで再起動
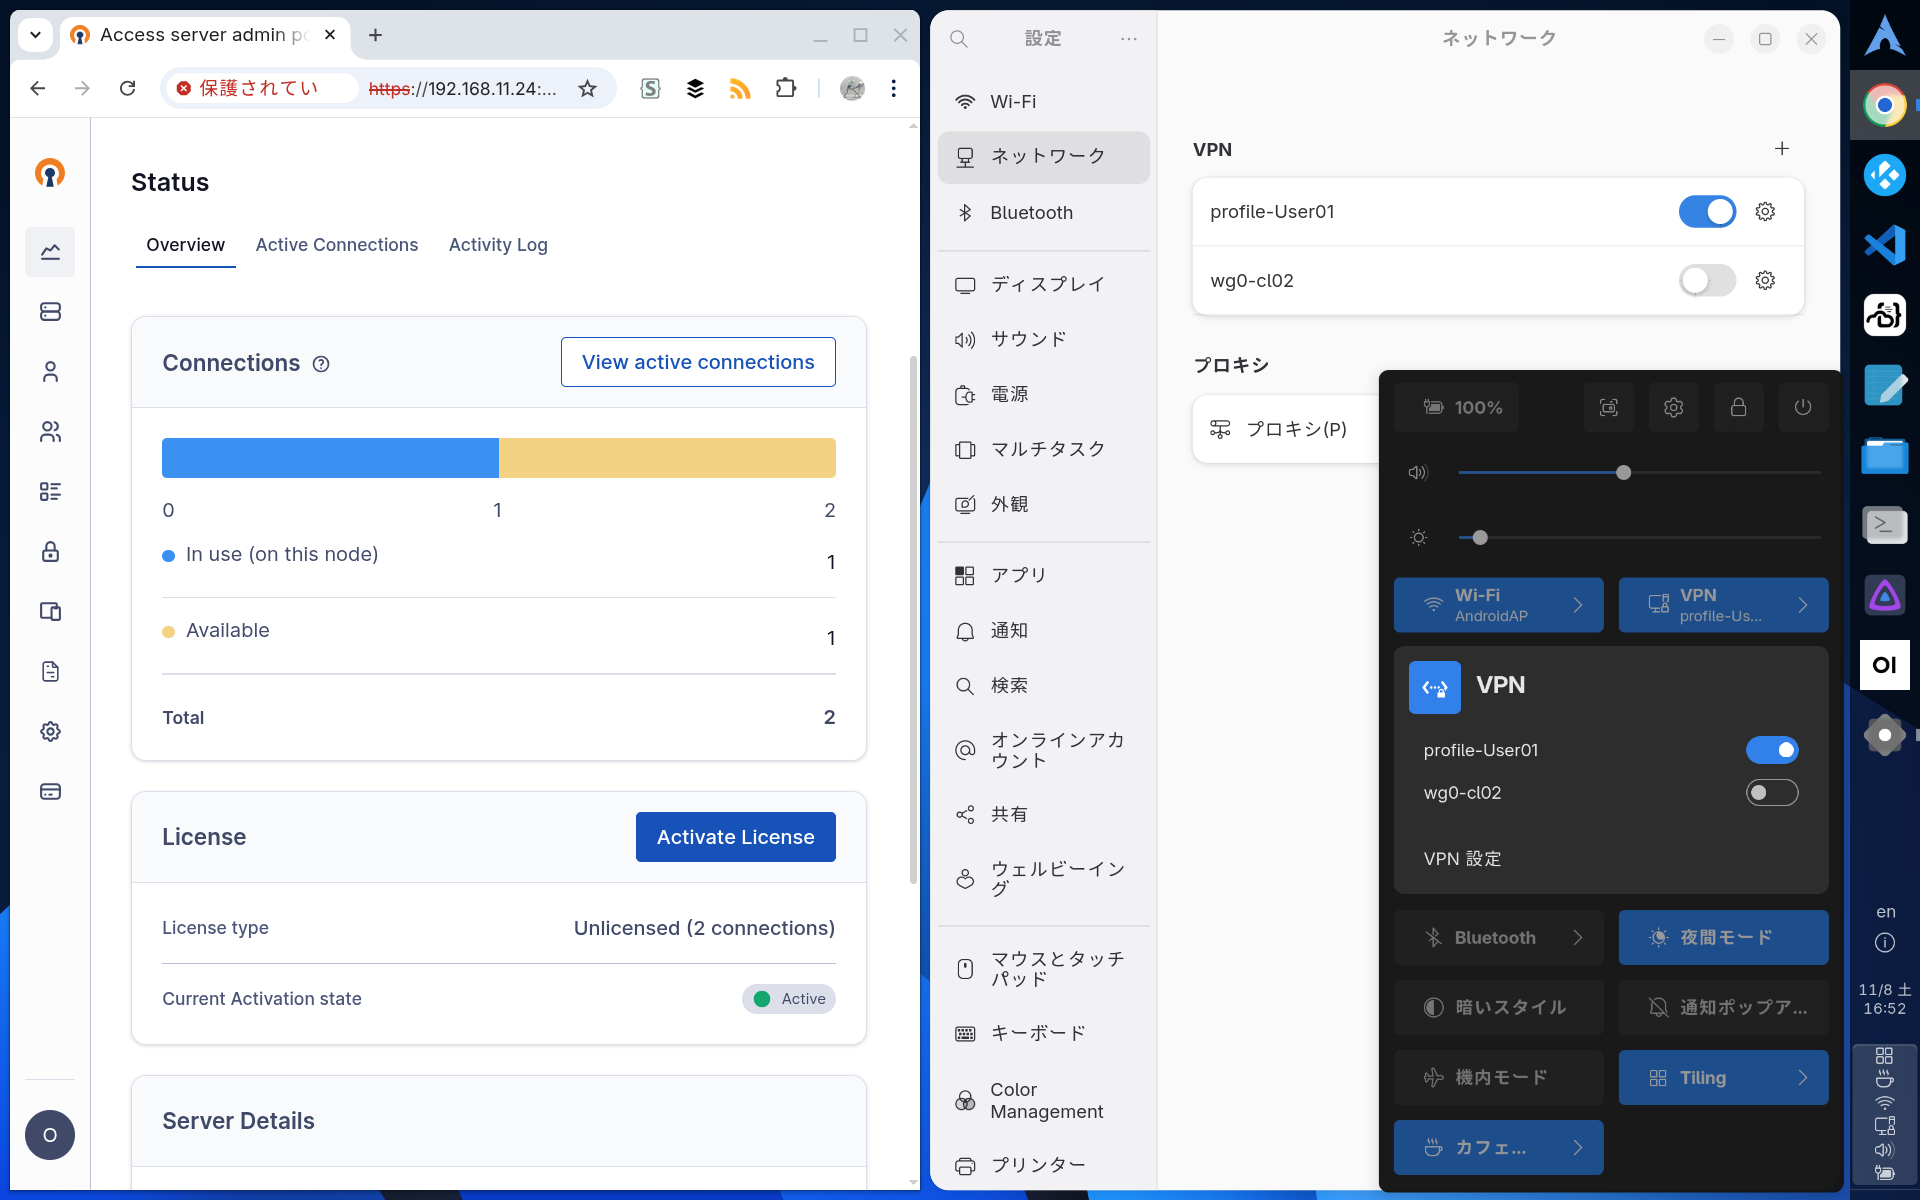
Status画面のwarningについて
CPU AES acceleration not available
OpenVPN Access Server was not able to detect AES acceleration instruction on the CPU (AES-NI on x86_64/ARMv8 AES extensions). This often caused by virtualization not passing through the CPU features.
Raspberry Pi 4Bに搭載されているBroadcom BCM2711プロセッサは、AESハードウェアアクセラレーション命令をサポートしていません。 一方で、ASIMD (Advanced SIMD、またはNEON) 命令はサポートしています。
そのままにします。カスタマイズしたい場合は以下を操作すればよいかもしれません。VPN Server > Security / Encryption > Data-channel ciphers
OpenVPN data-channel offloading was requested but failed to activate
OpenVPN data-channel offloading was requested but failed to activate. This typically happens if there is a configuration option that is incompatible with DCO or if the DCO kernel module could not be loaded.
以下で抑止できます。
VPN Server > Data Channel Offload > Use DCO if possible
Off
クライアントの設定
- OpenVPN Connectアプリをインストール
- OpenVPN Connectアプリで
profile-User01.ovpnをインポート
ルータの設定
- ポート変換
インターネットからの60000宛ての通信をRaspberry Pi 4BのIPアドレスの60000宛てに変換
Ubuntuのファイアウォール設定
- 受信設定
60000/tcp、943/tcpへの受信許可を追加
コンテナの自動アップデート設定
Portainerでwatchtowerコンテナを作成
項目 値 Name watchtower Image containrrr/watchtower:latest Volume(Bind) /var/run/docker.sock:/var/run/docker.sock Restart policies Unless Stopped デフォルト設定では全てのコンテナを対象とした初回のチェックが24時間後にスケジュールされました。
利用
Arch Linuxクライアントからの接続
Arch LinuxにOpenVPN接続プロファイルをインポートしてインターネット経由で接続し、LAN内のOpenVPNの管理者画面を表示
スマートフォンからの接続
OpenVPN接続プロファイルをインポートしてインターネット経由で接続
外出中にEPGStationの表示や予約ができて便利