Ubuntu 21.10 on RPi4B

Ubuntu 21.10 を Raspberry Pi 4B にインストールしてみました。
2021-10-23 以下の問題の修正が期待されます。
HDMI output freezes under current/proposed impish kernels
https://bugs.launchpad.net/ubuntu/+source/linux-raspi/+bug/1946368現在のバージョンは
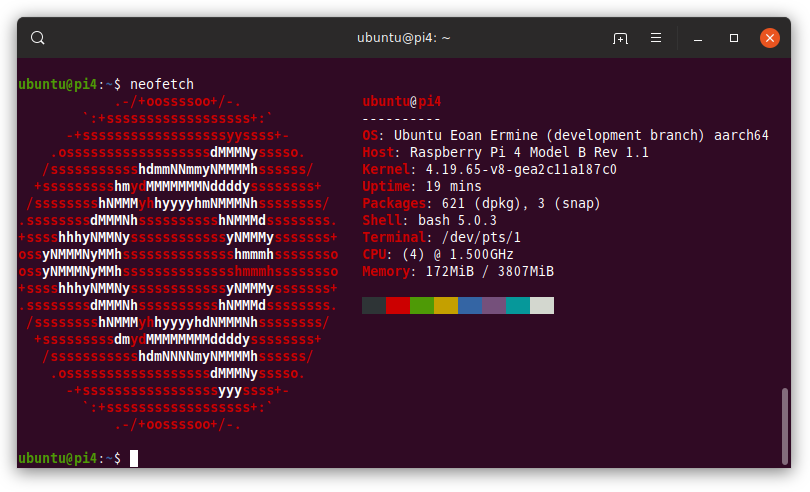
$ uname -r -v
5.13.0-1008-raspi #9-Ubuntu SMP PREEMPT Wed Sep 29 08:27:44 UTC 2021`
2021-10-30 proposed で修正版が公開されたようです。
https://bugs.launchpad.net/ubuntu/+source/linux-raspi/+bug/1946368/comments/60
Ubuntu のバージョンとパッケージバージョンの整理
| Ubuntu | 21.10 | 21.04 | 20.10 | 20.04 |
|---|---|---|---|---|
| Codename | impish | hirsute | groovy | focal |
| Release Date | 2021-10-14 | 2021-04-22 | 2020-10-22 | 2020-04-23 |
| End of Life | 2022-07 | 2022-01 | 2021-07 | 2025-04 |
| linux | 5.13.0 | 5.8.0 | 5.4.0 | 5.3 |
| gnome-shell | 40.5 | 3.38.1 | 3.36.1 | 3.34.1 |
| xorg-server | 1.20.13 | 1.20.9 | 1.20.8 | 1.20.5 |
| xrdp | 9.15 | 9.12 | - | 9.12 |
| pulseaudio | 15.0 | 14.2 | - | 13.99 |
| pulseaudio-module-xrdp | - | 0.5 | 0.5 | 0.5 |
環境構築
Ubuntu メディアの作成
Raspberry Pi Imager で SD カードに Ubuntu Server 21.10 (64bit) を書き込む。
Raspberry Pi 4B に SD カードを挿入して電源オンする。
ルータの DHCP サーバログから IP アドレスを確認する。(例: 192.168.11.4)
SSH で接続してパスワードを更新する。
ssh ubuntu@192.168.11.4
パッケージを更新する。
sudo apt udpate
sudo apt upgrade
Raspberry Pi 関連ツール
- ツールのインストール
sudo apt install raspi-config
- ツールの実行
sudo vcgencmd bootloader_version
sudo rpi-eeprom-update
sudo raspi-config
- ツールのインストール
config.txt の修正
https://bugs.launchpad.net/ubuntu/+source/linux-raspi/+bug/1946368
下の 2 行を追加する。/boot/firmware/config.txt # Config settings specific to arm64
arm_64bit=1
dtoverlay=dwc2
gpu_mem=512
dtoverlay=vc4-fkms-v3dビルド用パッケージのインストール
sudo apt install build-essential gettext meson m4
sudo apt install gdebi
デスクトップ環境をインストールする。
sudo apt install ubuntu-desktop-minimal
日本語化
sudo apt install language-pack-ja
sudo update-locale LANG=ja_JP.UTF8
sudo dpkg-reconfigure tzdata
XRDP をインストール
sudo apt install xrdp
netplan から network manager に切り替える。
/etc/netplan/99-my-config.yaml network:
version: 2
renderer: NetworkManagersudo reboot
Ubuntu Desktop の設定
ルータの DHCP サーバログから IP アドレスを確認する。(例: 192.168.11.4)
RDP で接続する。
ホームディレクトリの各フォルダ名を英語名に変更
LANG=C xdg-user-dirs-gtk-update
テキストテンプレートファイルの作成
touch ~/Templates/Text
日本語化の続き
Settings / Region and Language / Manage Installed Languages
を選択すると不足パッケージがインストールされる。「カラーマネジメントされたデバイスを作成するには認証が必要です。」の対策
/etc/polkit-1/localauthority/50-local.d/45-allow-colord.pkla [Allow Colord all Users]
Identity=unix-user:*
Action=org.freedesktop.color-manager.create-device;org.freedesktop.color-manager.create-profile;org.freedesktop.color-manager.delete-device;org.freedesktop.color-manager.delete-profile;org.freedesktop.color-manager.modify-device;org.freedesktop.color-manager.modify-profile
ResultAny=no
ResultInactive=no
ResultActive=yessudo systemctl restart polkit.service
「Authentication is required to refresh the system repositories」対策
# echo "X-GNOME-Autostart-enabled=false" >> /etc/xdg/autostart/gnome-software-service.desktop
# echo "X-GNOME-Autostart-enabled=false" >> /etc/xdg/autostart/gnome-settings-daemon.desktop
または
/etc/polkit-1/localauthority/50-local.d/50-allow-package-management.pkla [Allow Package Management all Users]
Identity=unix-user:*
Action=org.debian.apt.*;io.snapcraft.*;org.freedesktop.packagekit.*;com.ubuntu.update-notifier.*
ResultAny=no
ResultInactive=no
ResultActive=yessudo systemctl restart polkit.service
GNOME Shell の設定
Tweaks のインストール
sudo apt install gnome-tweaks
GNOME Shell 拡張のインストール
GNOME Shell Extensions
sudo apt install gnome-shell-extensions
Arch Menu
git clone https://gitlab.com/arcmenu/ArcMenu.git
cd ArcMenu
make install
Argos
git clone https://github.com/mwilck/argos.git
cp -r argos/argos@pew.worldwidemann.com ~/.local/share/gnome-shell/extensions
Dash to Panel
sudo apt-get install gnome-shell-extension-dash-to-panel
Tweaks & Extensions in System Menu
git clone https://github.com/F-i-f/tweaks-system-menu.git
cd tweaks-system-menu
meson build
ninja -C build install
ログアウトしてログイン
Extensionsを起動し、インストールした Gnome Shell 拡張を有効化する
アプリケーション
アプリケーションのインストール
Audacious
sudo apt install audacious
Chromium
sudo snap install chromium
Visual Studio Code
https://code.visualstudio.com/download
Download .deb packagesudo gdebi code_*_arm64.deb
XRDP のサウンド転送
XRDP でサウンド転送
前提パッケージ
sudo apt build-dep pulseaudio
sudo apt install libpulse-dev
ソースリポジトリの有効化
software-properties-gtk
「ソースコード」をチェック
インストール済みの pulseaudio (バージョン 15.0) のソースを展開
cd /home/ubuntu/repos
apt source pulseaudio
cd pulseaudio-15.0+dfsg1
meson build
(pulseaudio-module-xrdp がサポートする) pulseaudio 14.x のソースを展開
cd /home/ubuntu/repos
git clone -b stable-14.x https://gitlab.freedesktop.org/pulseaudio/pulseaudio.git
cd pulseaudio
./bootstrap.sh
./configure
config.h の移植(14.2 から 15.0 へ)
cd /home/ubuntu/repos
cp pulseaudio/config.h pulseaudio-15.0+dfsg1/config.h
sed -i -e 's/14.2/15.0/g' pulseaudio-15.0+dfsg1/config.h
pulseaudio-module-xrdp のインストール
cd /home/ubuntu/repos
git clone https://github.com/neutrinolabs/pulseaudio-module-xrdp.git
cd pulseaudio-module-xrdp
./bootstrap && ./configure PULSE_DIR=/home/ubuntu/repos/pulseaudio-15.0+dfsg1
make
sudo make install
ls $(pkg-config --variable=modlibexecdir libpulse)
ログアウトしてログインすると、サウンドの出力デバイスが
xrdp sinkになる。
内蔵ヘッドフォンに戻った場合はpulseaudio -kで回復する。
Wi-Fi アクセスポイント
Bluetooth
Bluetooth の有効化
sudo apt install pi-bluetooth bluetooth bluez
sudo usermod -a -G bluetooth ubuntu
sudo reboot
Flatpak
sudo apt install flatpak
flatpak remote-add --if-not-exists flathub https://flathub.org/repo/flathub.flatpakrepo
sudo reboot
接続構成検討
インターネット経由接続
クライアントから OpenVPN のトンネルを通して RPi4 に接続する方式。接続できた。

ルータ経由接続
クライアントから Wi-Fi ルータ経由で RPi4 に接続する方式。接続できた。

直接接続
RPi4 を Wi-Fi アクセスポイント化して直接接続する方式。
ルータがない場合でも RPi4 と Android スマートフォンは接続が可能。接続できた。

https://gist.github.com/narate/d3f001c97e1c981a59f94cd76f041140
画面転送
RPi4 の画面出力を HDMI キャプチャ機器からクライアント端末の入力とする。
マウスとキーボードは本体に接続する。接続できたがクライアントのバッテリーの消費が激しい。

メモ
SD カード起動
- Ubuntu Server を入れてから Ubuntu Desktop をインストールした方がよいかもしれない。
- 物理ディスプレイを HDMI 接続した環境では GDM からログイン直後に再起動してしまう。
以下の問題かもしれない。
https://bugs.launchpad.net/ubuntu/+source/linux-raspi/+bug/1946368 - USB HUB を接続すると Ubuntu がうまく起動しない。
USB 起動
- Raspberry Pi OS は USB ブートできた
- Ubuntu Server / Desktop は USB ブート中に再起動がかかってループ。